"Every accomplishment starts with a decision to try." -unknown

I have two hummingbird feeders in my backyard. I have them because: 1. I like hummingbirds, 2. I want to try to get some photos of them. The little buggers must be coming to eat from my feeders because they are empty. I keep refilling them. I seem to be spending quite a lot on sugar trying to feed these little creatures, but I have yet to capture one photo of them. I read an article about "how to photograph hummingbirds", which stated to increase the sugar content to entice more of them to choose your feeder. I did that. No pictures, just increase in sugar cost. One day as I was putting a new supply of juice out, I said to God, "Lord, I sure would like to be able to capture just one good picture of a hummingbird this year. And better yet, could I find a nest? I would like to see what a nest looks like." Later, we left for Santa Fe. One morning, I was locking up our hotel room, and I noticed a hummingbird flitting about. I stood to watch it for a few minutes. It landed in a tree right outside our door. I went to look closer, and was so excited to see it on a nest. "Glory Be!" It was certainly a 'God Stop' for me...(Beth Moore uses the term when you recognize that God has made Himself known to you...you Stop...and KNOW it has God's fingerprints all over it.) This was one of those times. I think God is pretty awesome to grant even our littlest requests. Sometimes they seem insignificant, but believe me, this was monumental to me. I felt so blessed! So my number one find is a hummingbird sitting on its nest.
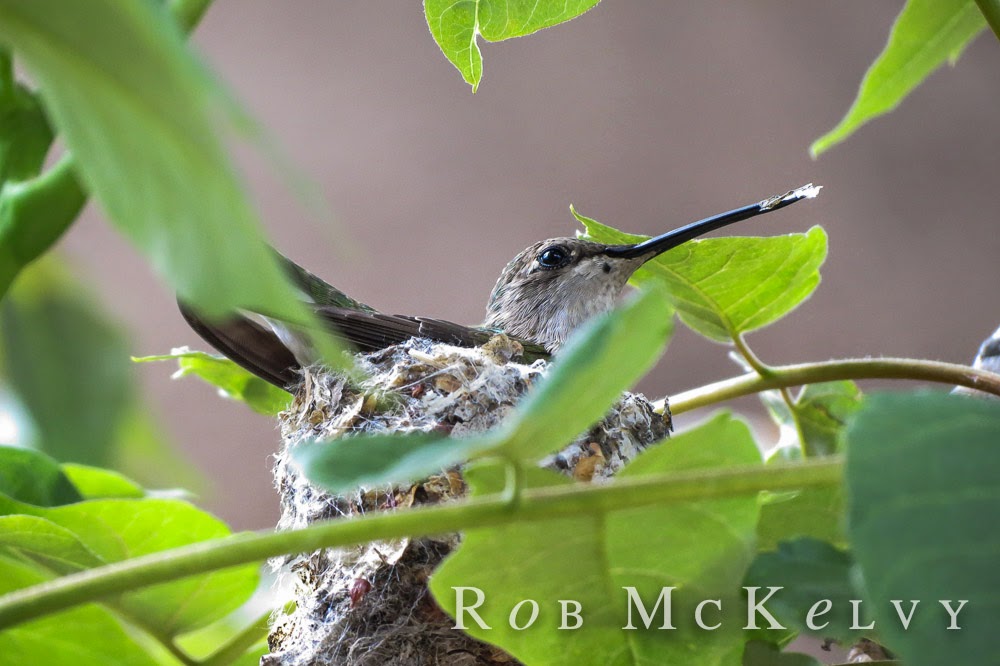 |
| Dedicated mom... |
 |
| So thankful I got these photos... |
My next find was folk art...I like folk art a lot. It is quirky, colorful, and fun. On Canyon Road in Santa Fe, I found an artist that had some pieces I really liked...but not the price. I was content just to photograph them.
 |
| You cannot live in New Mexico without hearing about, or seeing a bunch of Billy the Kid stuff. |
I took a picture of this particular piece with my iPhone to send to my oldest son, who is now 41 years old. When he was a little boy, he would gather scraps of block wood, and make boats. I told him maybe he should think about doing that again...this piece was priced in the hundreds. He could have another profession on the side. He texted back that he still had his boats, and that maybe he should put them on eBay. Anyway, I rather like this piece of art work...especially the colors.
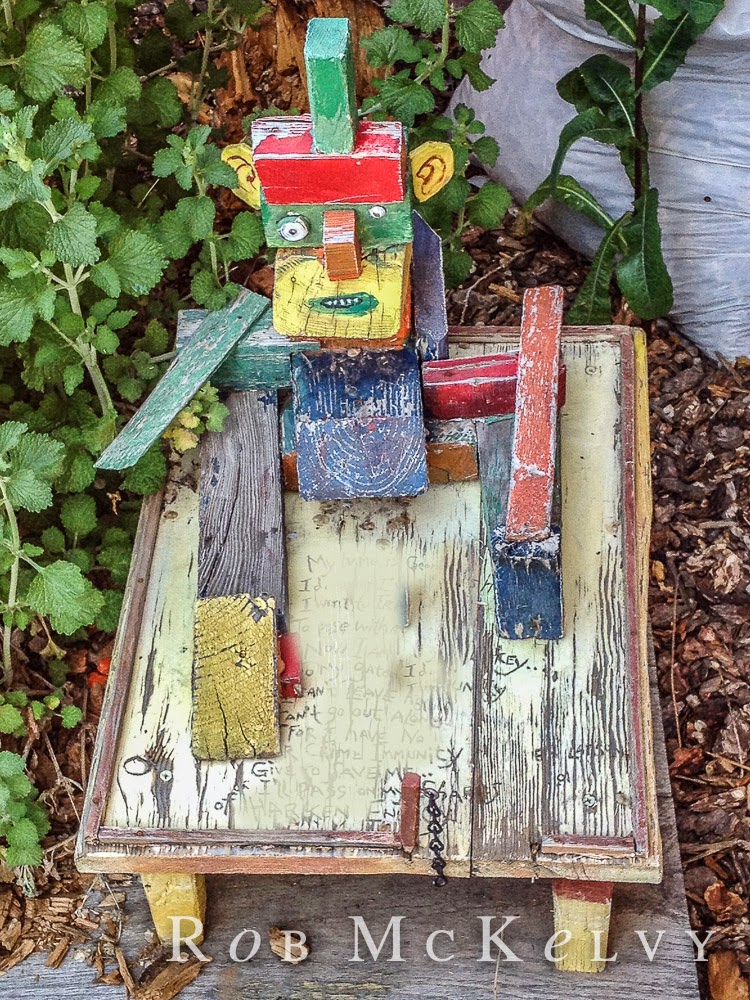 |
| I brushed out the words written on the piece because I did not like them. |
In our hotel room was a very colorful shift-robe. Again, I was probably drawn to it because of all its colors. This seems crooked...well, it is, but not because of my photography. Nothing in the room was straight. Adobe dwellings are very seldom straight, and our hotel was not the exception. It was very slanted...especially after 200 years...which was the age of our particular casita.
I wanted to try to duplicate this technique. I have an old end table outside that is in not very good shape. I used it to make my own version of the multicolored furniture.
 |
| my "new" old table |
I wish I had taken step-by-step photos, but I did not think about it until I was finished. For those who would like to try this, here is what I did. First this table had no stain or paint on it originally...just the bare wood. 1. I painted the whole thing red. Let it dry 2. I took a votive candle and colored various spots with the wax from the candle...just rub it over the surface. This will keep the next layer of paint off the previous red paint. 3. I painted the whole table with green. Let it dry. 3. Color the green layer with the votive candle again...the wax keeps the next layer of paint off the green. 4. I painted the whole table with a cream color. Let dry. 5. Color with the candle again. 5. I stained the whole table with a dark wood stain. 6. With a putty knife, scrape off all the wax. 7. Sand lightly. 8. Apply Polyurethane.
Lastly, I have seen wonderful craft projects using wooden pallets. I like the ones that have quotes on them, or directions for a wedding reception. I went out looking for wooden pallets, found one, and painted a scripture on it. I absolutely love it! I painted the pallet very roughly with white paint...using a dry brush. I sort of penciled in where I wanted the letters to make sure they would fit. Then, I got a very fat Sharpie, and free-handed the letters.
 |
| my front porch... |
And do not forget today is the 70th anniversary of D-Day. A salute, and thanks go out to all who participated, and died that day, so we can enjoy our freedom today.
 |
| our front yard... |
Remember June 6, 1944...
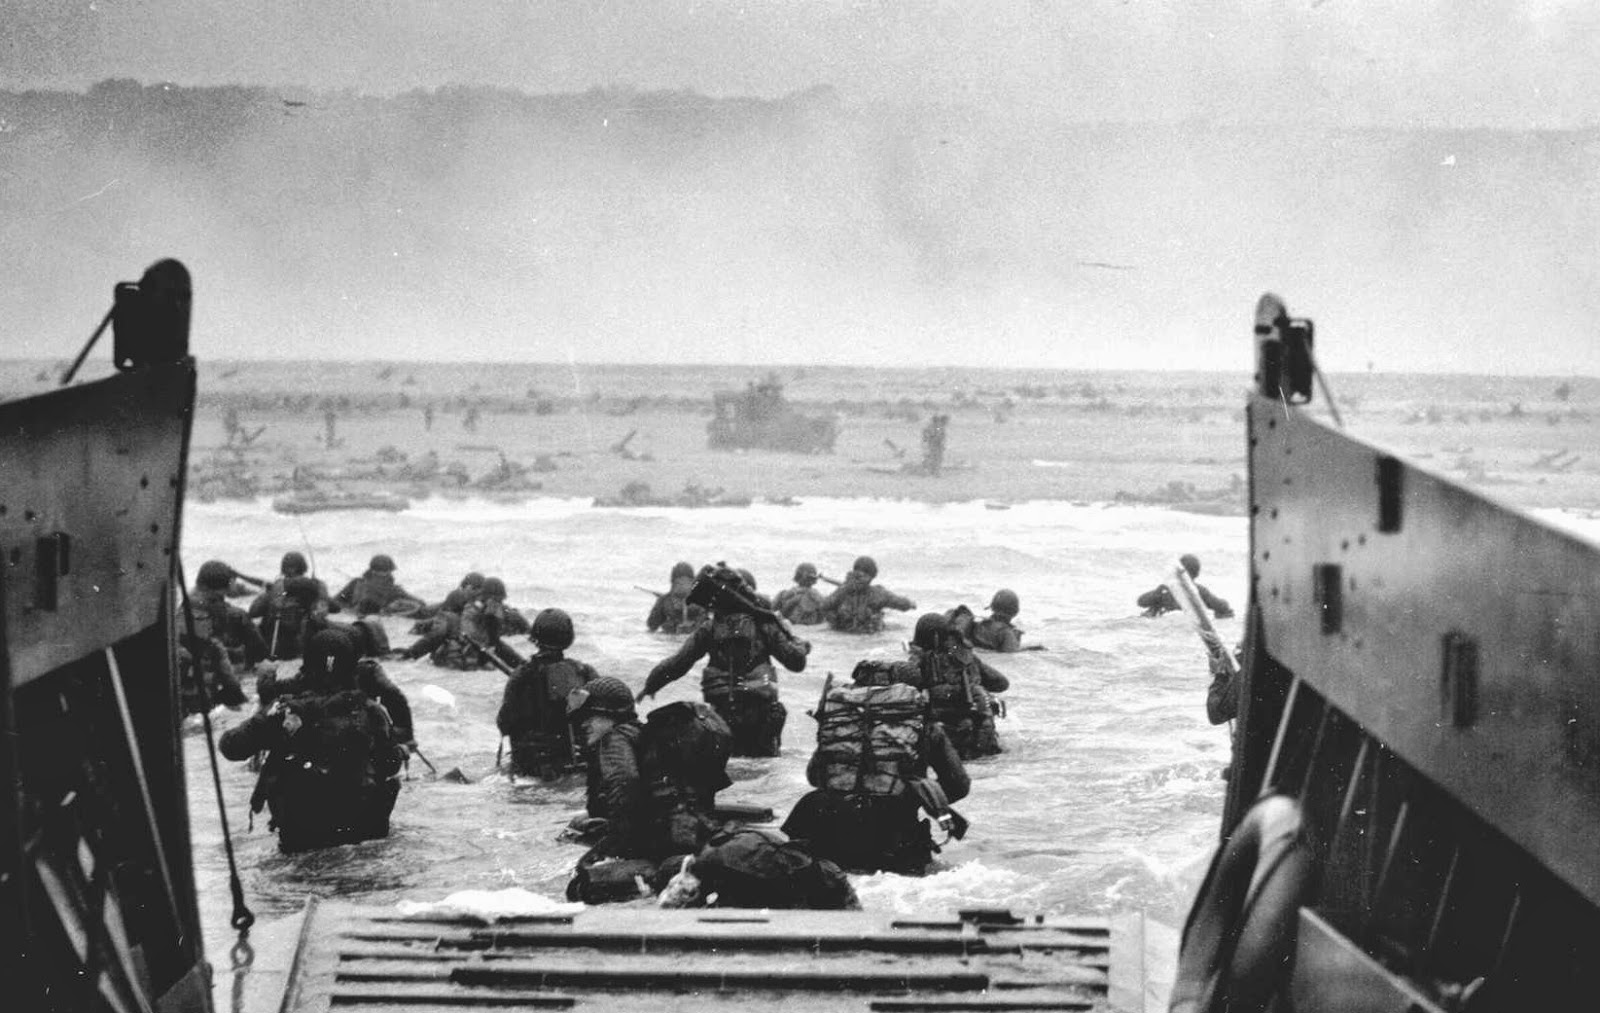 |
| photo from www.quantumconservative.com |
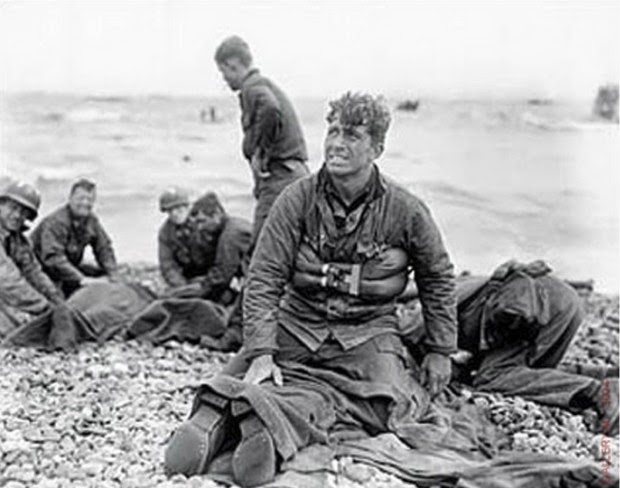 |
| photo from: www.theblaze.com |
Thank you!


1 comments:
Great photos. I LOVE the scripture pallet you made. Very nice! And wow, that last photo....Talk about heroes. My eyes welled up with tears just seeing that photo. Thank You, God, for all the brave men and women who have demonstrated the ultimate act of bravery and love: laying down their lives for our freedom! May we never forget!
-Laurie
Post a Comment